A DIY for the DIY challenged
I have a confession: I’m a huge klutz. I had a party at my place over the weekend for a handful of friends and the only thing that got broken was something I broke myself: my very favourite cherry blossom lamp.
I thought I would try to do a DIY post about what to do if you should find yourself with a broken cherry blossom lamp, but the internet didn’t provide anything useful. I guess normal people don’t break their own lamps at their own parties. Sigh. Plus it was probably a little overly ambitious of me to try and work with broken glass on my first DIY adventure.
What I did find however, is this fun, easy and cheap (read: FREE) do-it-yourself project that is particularly awesome if you have little girls that need to be entertained. I wish I had stumbled upon this little gem while my mom still required my babysitting services for my kid sister.
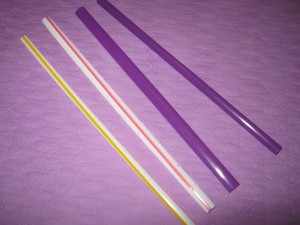
All you need are bobby pins, scissors and drinking straws (seriously!). I got mine at McDonald’s and Jugo Juice, but any straws will do (except for “bendy” straws – those will make your life difficult during this project). I chose these two because of the pretty colours (Starbucks would also be good – bright green). Here we go!
Note: My pictures skip a few steps, so if you get confused, follow the instructions (or the video!) at Instructables!
1. Flatten out your straws. I did this by running the straws back and forth along the edge of my dresser drawer (the side of a table, a book, or a heavy object over top will also work).
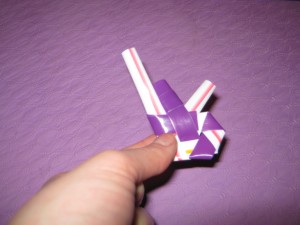
2. The folding is the tricky part (and, as it happens, the bulk of the project!). I took these instructions direct from the site so as to avoid confusing you!
We’re going to call the white straw #1 and the purple straw #2.
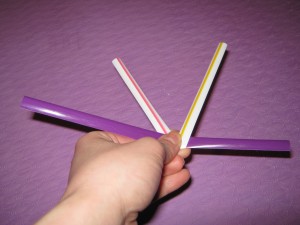
1)Fold straw #1 in half and angle it to form a “V” then slide straw #2 into the bottom of the “V” shape.
2)Fold the right end of straw #2 up in FRONT the right side of straw #1 so that it is parallel with the left end of straw #1.
3)Fold the right end of straw #1 around the FRONT of the right end of straw #2 and tuck it BEHIND the left end of straw#1.
4)Take the right end of straw #2 and fold it over the FRONT of straw #1 and tuck it BEHIND the left end of straw #2.
5)Take the right end of straw #1 and fold it BEHIND the left end of straw #1, then bring it in FRONT of the right end of straw #2. (It should now be parallel with the left end of straw #2.)
6)Fold the right end of straw #1 BEHIND the right end of straw #2 and tuck it in FRONT of the left end of straw #2.
7)Fold the right end of straw #2 in FRONT of straw #1 and tuck it BEHIND the left end of straw #2. Then fold the right end of straw #1 over the FRONT of both ends of straw #2 and BEHIND the left end of straw #1.
8)Bend both sides of straw #2 down so that the longer end will lie down flat over the middle of the heart.
9)Tuck this longer end under the cross section of straw #2 that runs straight through the middle of the heart.
10)Pull this end through the cross section tightly.
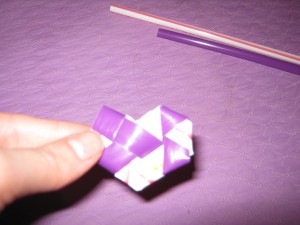
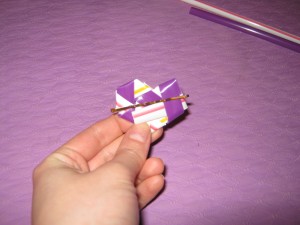
3. Before your “heart” looks like the one in the picture below, you’re going to have to trim a couple of the ends so that they’re flush with the edges of the shape. Trim a little V into the top to give it a distinct heart shape.
4. Shimmy the bobbypin into the back of the heart (the backside will be the one with visible ends). Be careful when doing this, you don’t want to rip apart all of your hard work!
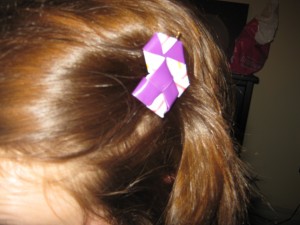
And now you have a really cute and unique hair accessory! Personalize with different coloured straws. Awesome idea for rainy days, stocking stuffers, birthday party goodie bags, or just for fun.
I have officially made it through my first DIY! Now what am I going to do about that lamp…

Evan H
hmm, I don’t know how well these would go with my “look” but I am never one to argue with purple!
Perhaps I’ll give it a go on my lunch break as I work right beside a wonderful restaurant that has delightful purple, orange and blue straws!!
Hooray for DIY!