Used furniture DIY: clocks
In addition to preventing you from being late, clocks can be a stylish accessory to any home. Today I’m here to tell you how to make your own, spiff up an old clock or transform a clock into something completely different. Not only that, but I’ve got something for everyone; the rustic, the floral, the crafty, you name it, it is here.
Once again, we’re having fun turning the used furniture others consider trash into something fabulous!
The grandfather clock; beautiful, statuesque, classic – the list goes on. This is a wonderful piece for any home. But what if that’s not what you want anymore? Maybe it doesn’t blend with the style of your home, doesn’t work and is too expensive to fix or you’re downsizing and really don’t need such a large decorative piece but you can’t part with it as it’s an heirloom.
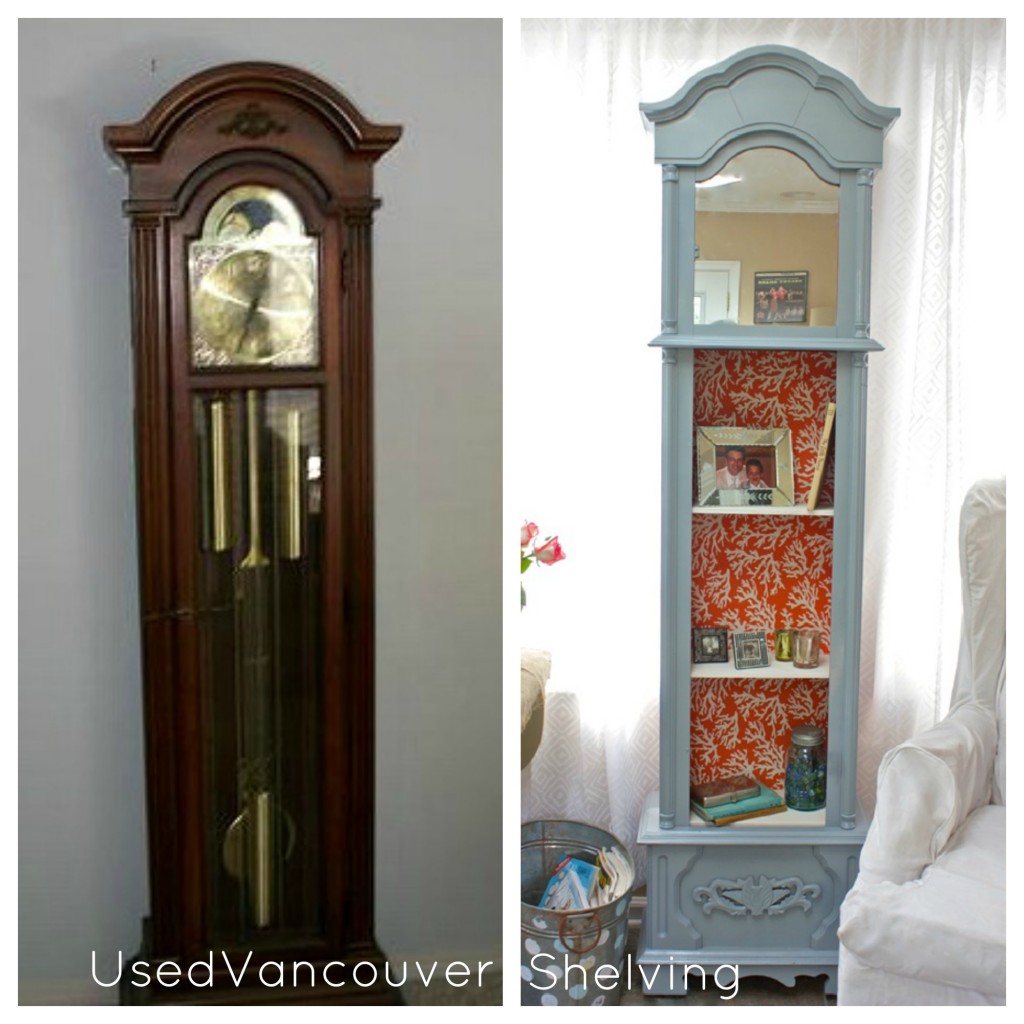
Whatever the reason, I have a handy transformation for the clock that will be right up the alley of those looking for something a little new, a little quirky, a statement piece. So here we have… the grandfather clock turned shelf.
Shelving: Turning this clock into shelving is perfect for those with not much room to work with. You get an eye catching piece of decor that performs double duty as shelving.
First, remove the clock and then paint the wood. In the full tutorial by Trash to Treasure, spray paint is used as the wood is thin and there isn’t much room for distressing. Then a mirror that was cut to fit was secured with liquid nails in the place of the clock face. For that, you can use an old mirror that you have lying around, or if not, you can grab one off your local Used.ca site.
From there, you can either paint the interior with a fun pattern or add a cool wallpaper. Add wood planks as shelves within the clock. To fix the shelves in place you can screw thin blocks of wood onto the sides for the shelves to rest on. Then you’re done and you can use the shelves for books, photos and more.
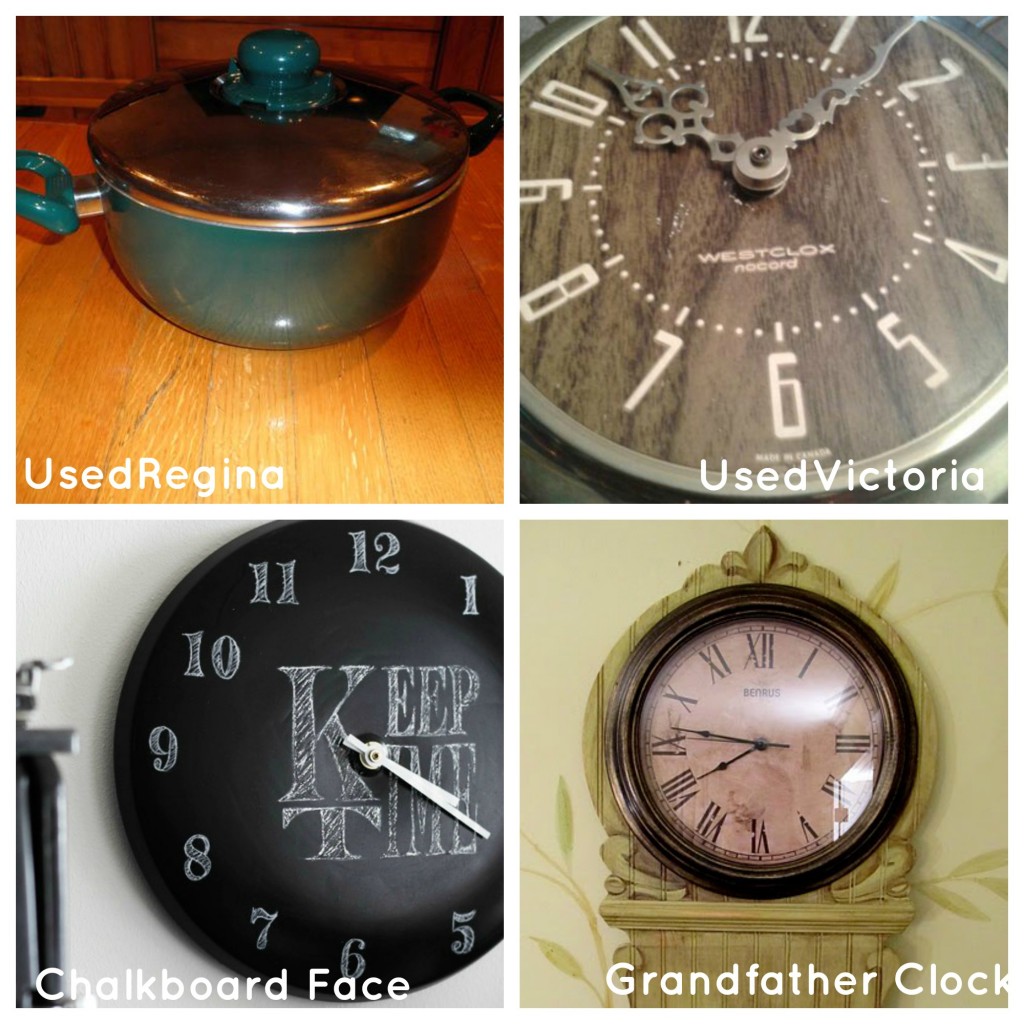
Chalkboard face: I love this chalkboard face clock. It adds a beautiful touch and you can customize it as you please.
This clock is actually made from a pot lid which is a cool way to reutilise an old pot – this is where the Free Tab on your local Used.ca site comes in – use it and use it some more!
First, remove the handles and sand the pot lid. Paint the lid with chalk paint. Paint the clock hands white. Make and print a design of your choice. Then, rub the back of the print with chalk. Transfer by tracing the outlines of the design on the lid using a pencil. Then fill in the design. Finally, clean up the edges with cotton pads and seal with spray lacquer to make it permanent.
Use a clock kit to get it working. Full tutorial from Precious Sister.
You could also upcycle a different object and leave space at the bottom or sides so you can write in different notes each day.
Grandfather clock: This Trompe L’oeil grandfather clock is surprisingly simple to make. It’s only 2″ deep but stands 6’6″ and gives a lovely touch to a room’s decor without taking up much space.
Here’s the how to: draw and cut the pattern you want using poster board (you only need a half, as you can flip over to make the full clock). Put pattern up against exterior bead board and use a sharpie to trace around the pattern. Then cut out the pattern (go slow) and sand the edges. Then, cut a whole in the centre, the size of the clock you have, and add wood underneath and near the bottom. Paint the colour of your choice. Add the clock and add any decorative touches along the wood as you’d like. Detailed instructions and a picture of the full clock from Cottage Hill.
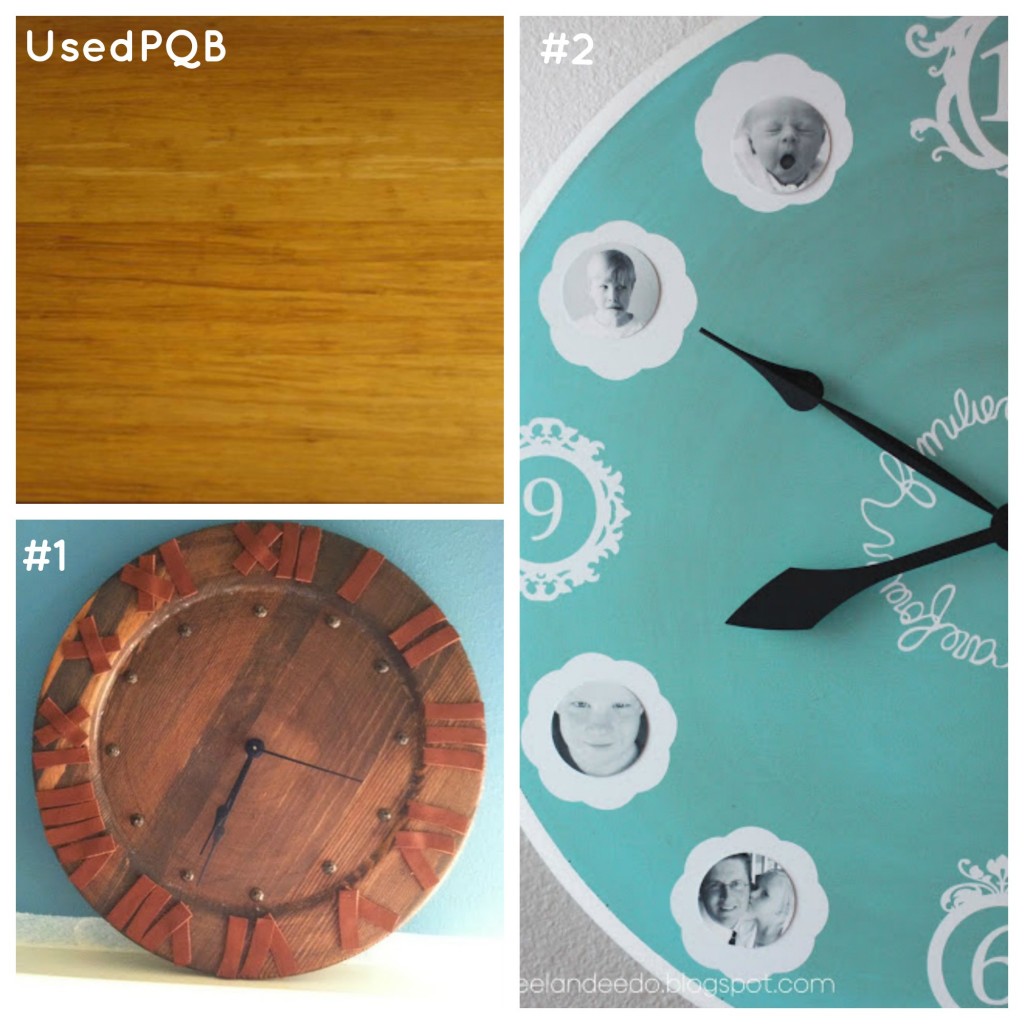
#1 Rustic chic: This rustic clock would make a cool addition to any house, cottage or cabin. You just need a wooden plate or some planks of wood you can cut into a circular shape (or any shape you prefer, really), leather or metal strips, tacs, clock kit, hot glue gun and a mallet. First, stain the wood. Second, put in the tacs and then glue the leather strips on or if you prefer metal strips you will need to drill holes in the metal and then screw them into the wood. Then, drill a hole in the centre and from there put together the clock kit. Full instructions from Prudently Painted Vintage.
#2 Faces for numbers: This is a more sentimental clock and shows the passing of time literally and symbolically through the pictures around the clock. This tutorial is from the lovely Landee See, Landee Do blog. Begin (again) with an old wooden plate or wooden boards. In the instructions an old clock is actually taken apart and that is another great option, just depends on what you have/can find. First, spray paint clock the colour of your choice and paint the edges the colour you want the details to be. Then, find vinyl stickers you like that work or use a Silhouette SD to cut some, as utilized by Landee See, Landee Do. Then, print your favourite pictures out on cardstock and tape them (tape so you can switch it up in the future) to the blank spaces. Then, use a clock kit to get the clock working once more.
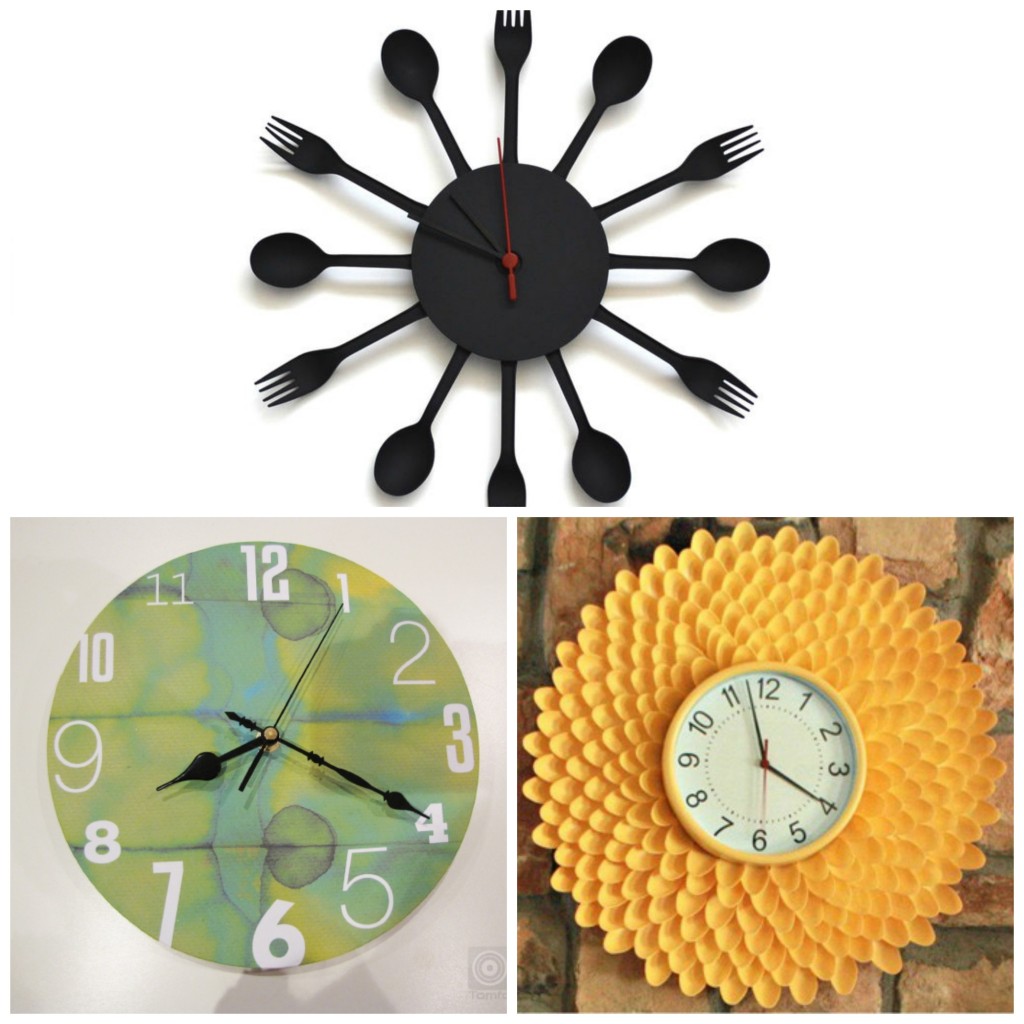
These last few clocks don’t require many materials – plastic spoons, clock kits and a little paint seem to be the main items. These are more ‘from scratch’ DIYs and not quite upcycles but I thought I would add them in as I think they’re pretty awesome:
Kitchen inspired clock: From Instructables.
Kid’s craft clock: From Tomfo.
Chrysanthemum clock: From That’s What Che Said.
I hope you enjoyed these clock upcycles. Let me know if you’re planning on attempting any of these DIYs!


