Oh, Christmas (pallet) tree
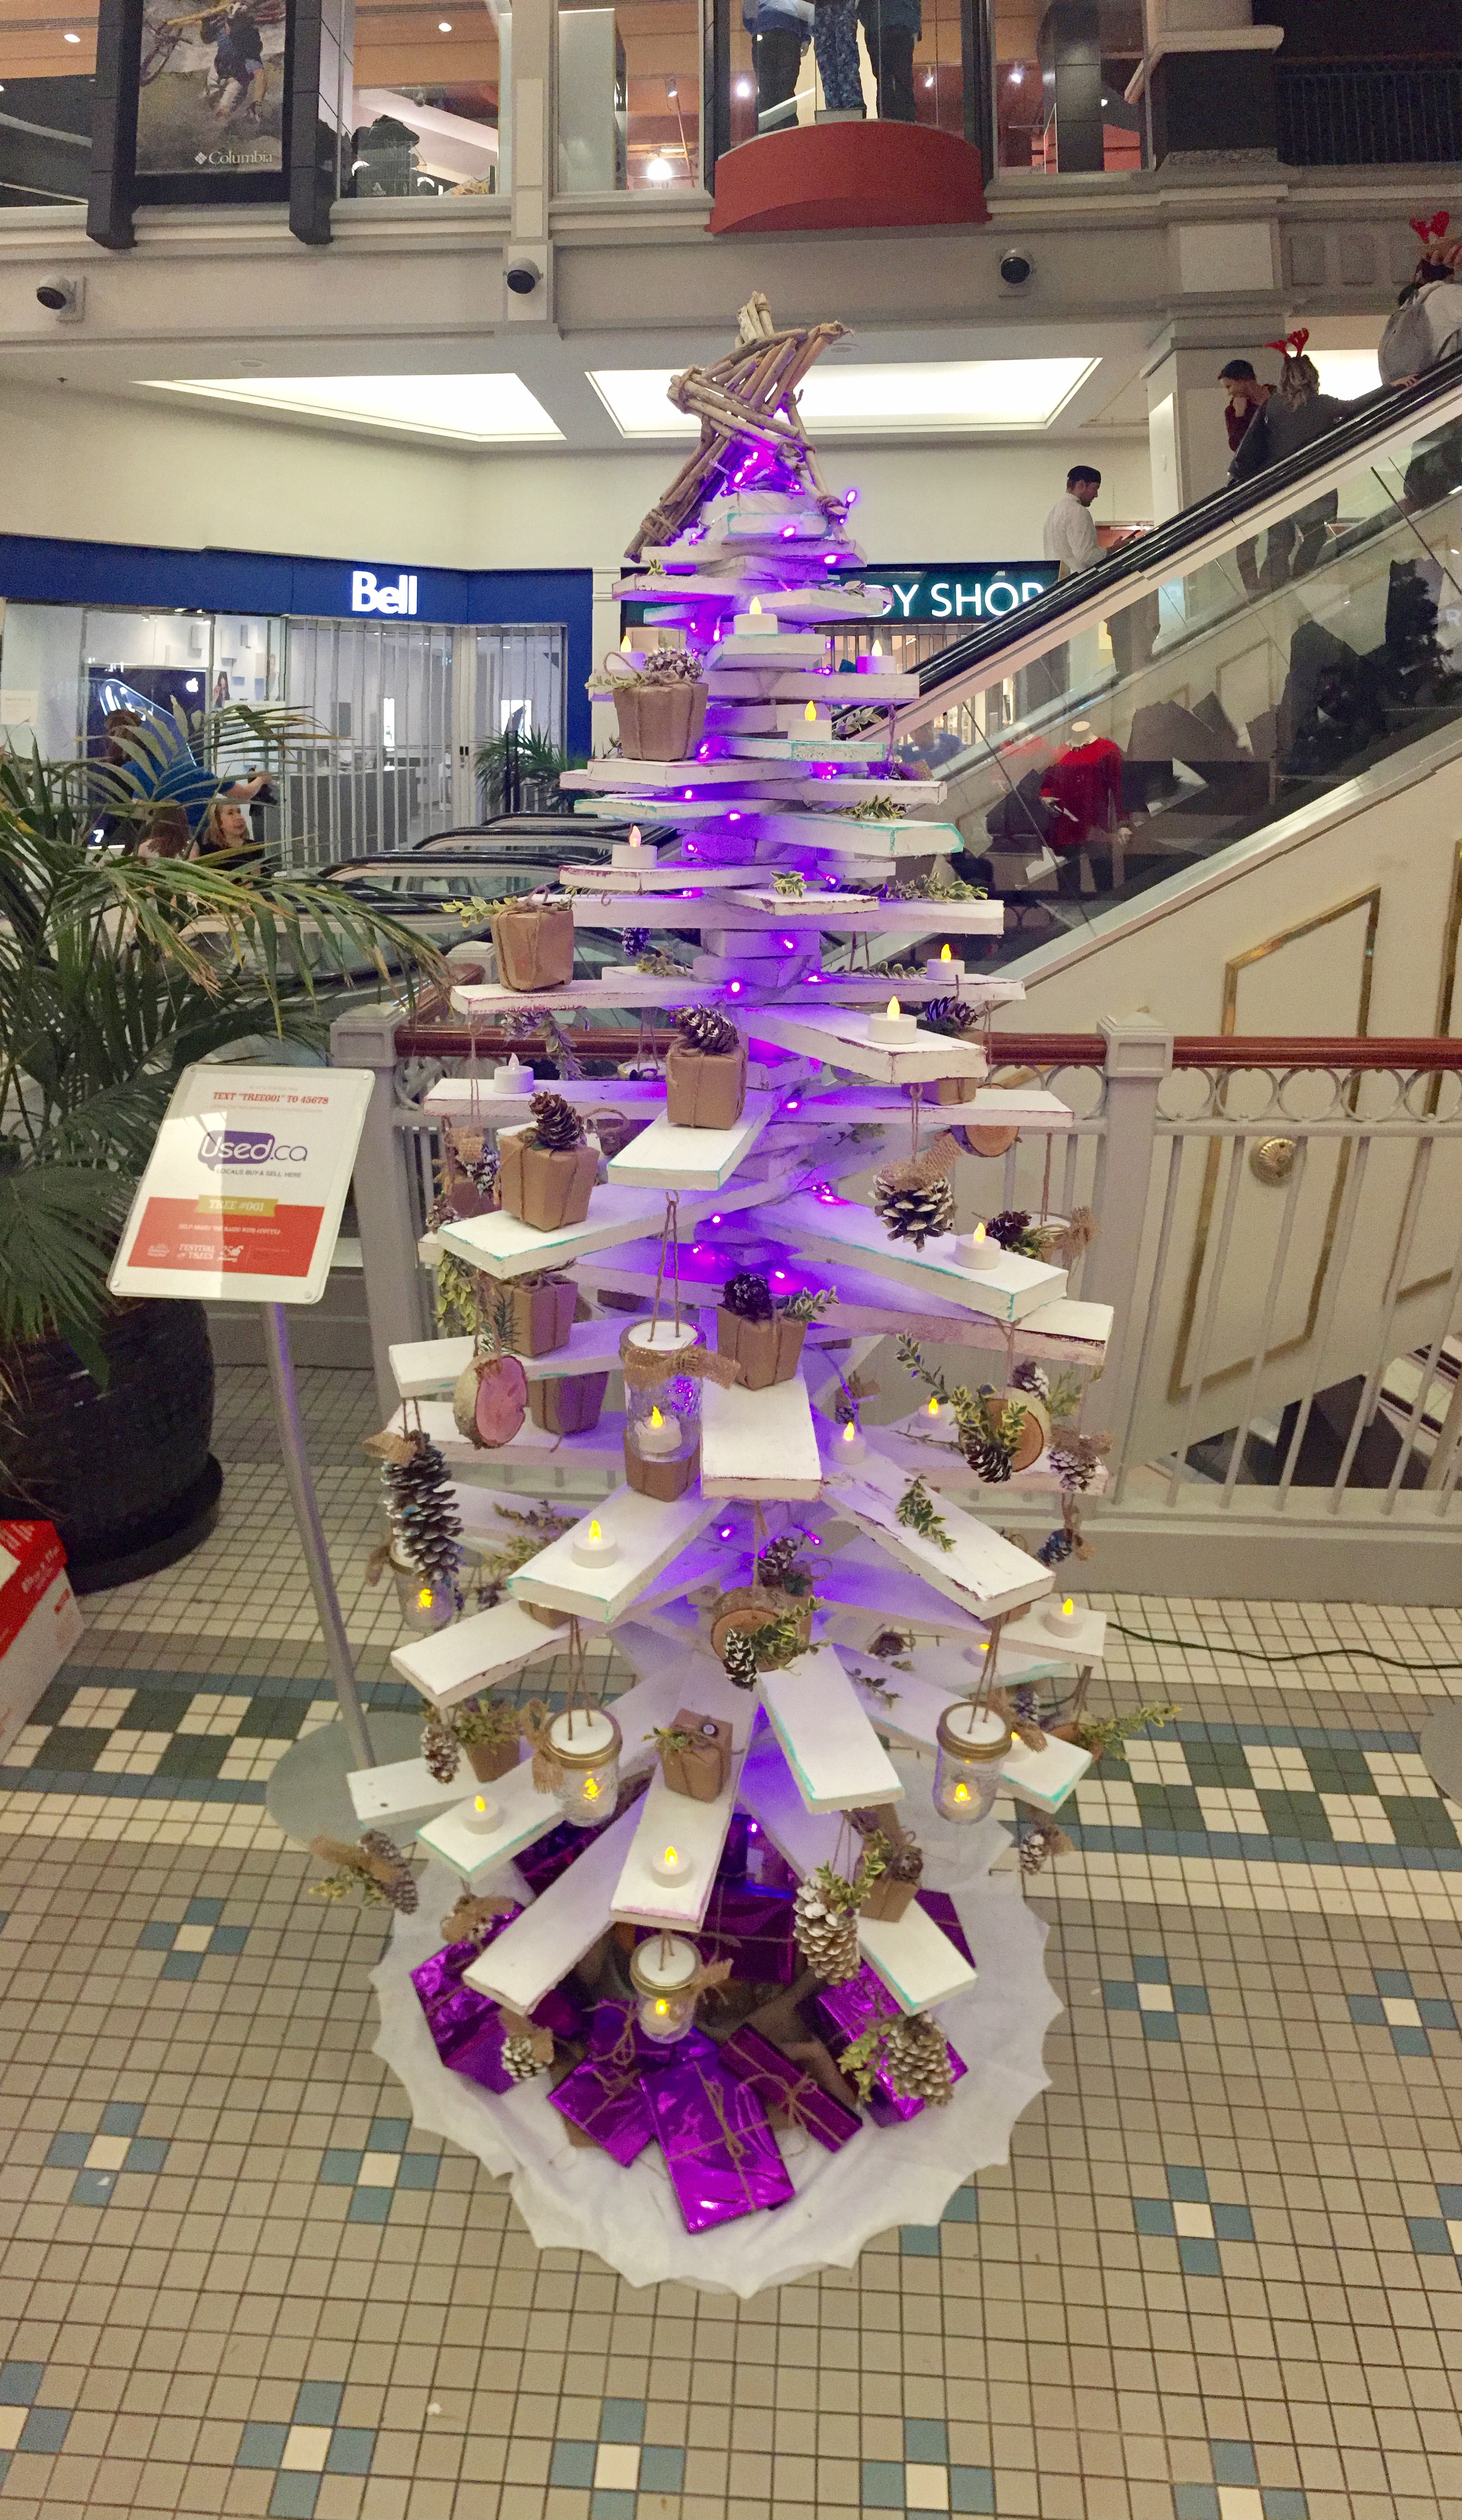
Every year, at UsedHQ we look forward to the Victoria Festival of Trees in support of the BC Children’s Hospital. It’s a great opportunity to join our community by getting into the holiday spirit and decorating a tree to raise money for a great cause. This year, we decided to do away with the standard green artificial tree and create a masterpiece of our own using free pallets from UsedVictoria.com. Follow the steps below to make your own version of this tree and be sure to post a photo on social media and tag Used.ca so we can see your creation!
If you like our tree, please consider donating to the BCCHF by texting TREE001 to 456-78; donations of any amount will be directed to the charity.
Pallet tree tutorial
Materials required
Tools
Crowbar
Hammer
Skillsaw
Drill with a 1.5″ spade bit
Paintbrushes
Sandpaper
Other items
6 double-sided pallets (only 5 are required for the plan, but some slats will break or split when you take them apart)
Country Chic paint in Simplicity
Acrylic paint in purple and teal
1 Dowling 1.5″x 6′
Overview
Our idea was to incorporate Used.ca’s main colours, purple and teal, into a whitewashed pallet tree utilizing techniques we learned at a ReLoving Furniture painting workshop. The tree is essentially pallet slats stacked at varying degrees onto a six foot piece of dowling. Here are the steps it took to get our finished product
Step one – Find pallets
Click here to search for free pallets on your local Used.ca site. If none turn up, you can go to a local hardware store or shipping company as they often have extras they will give away at no cost
Step two – Plan the tree
Finding a template to plan out the tree was difficult, even with the power of Google! Gina, our Art Director, created a template for the construction of the tree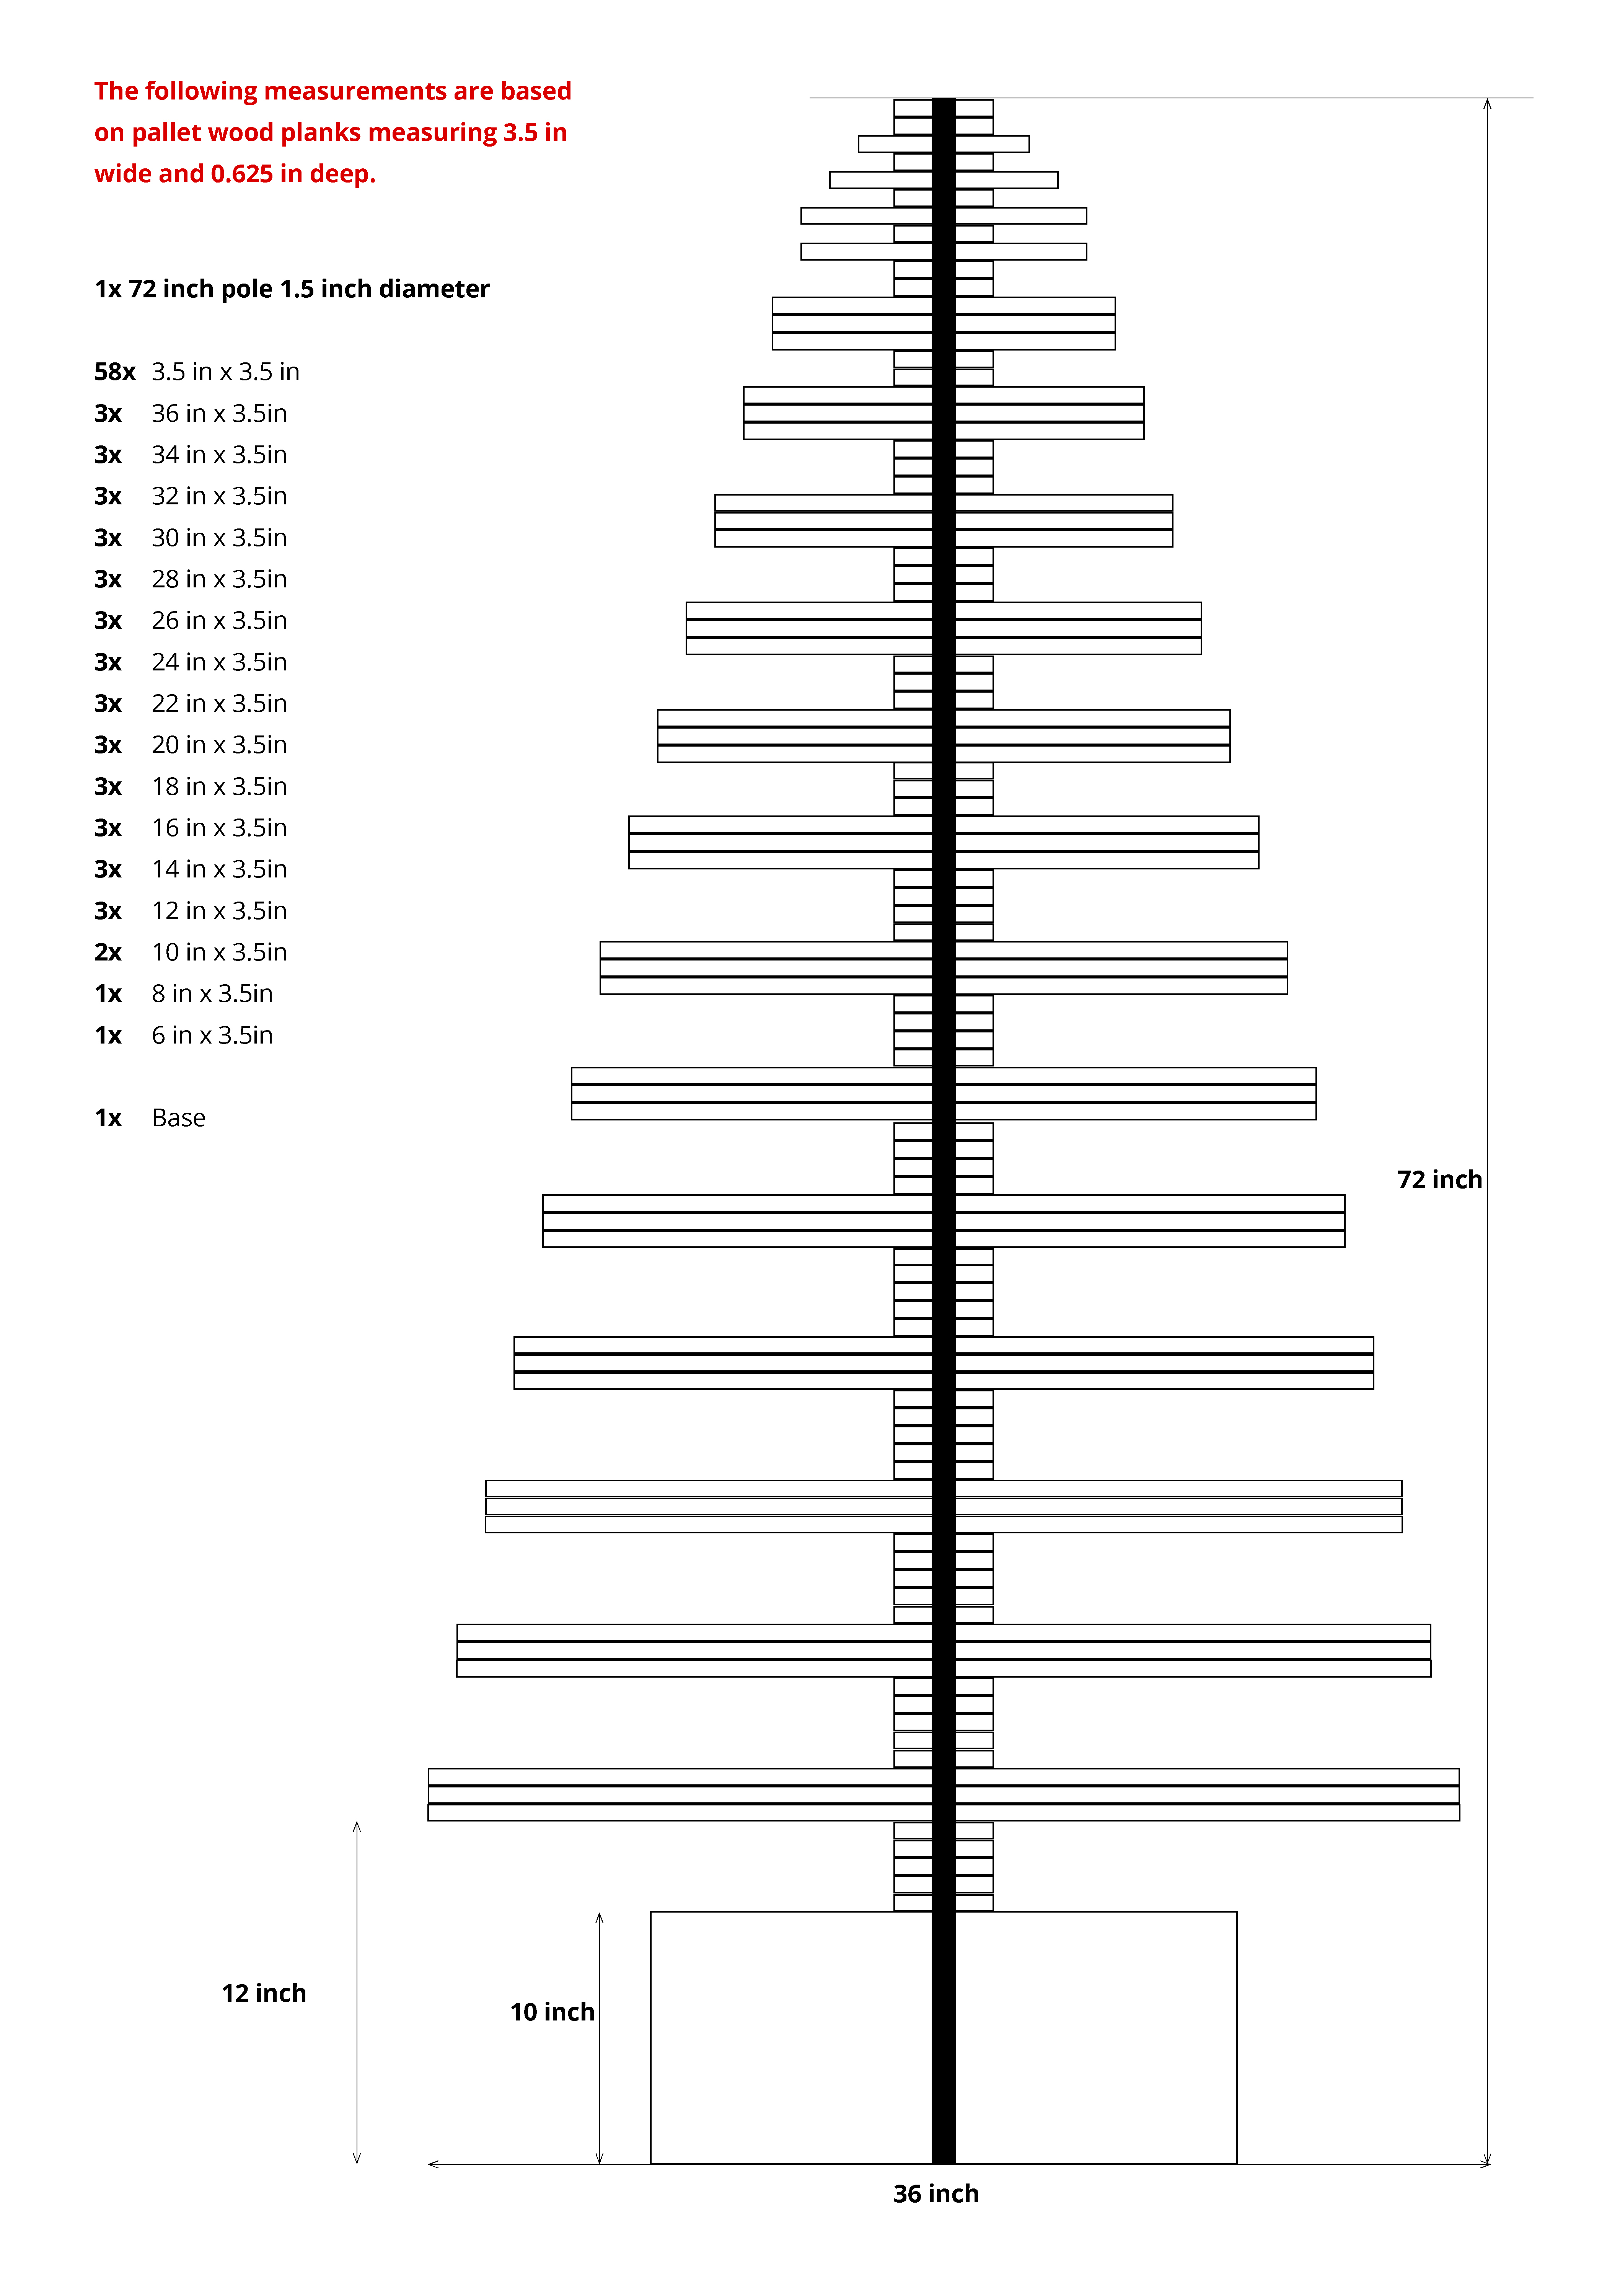
Step three – The not so fun part…for some people, anyway…
This is the phase that will leave you wondering why you are doing this. But, remember, once the hard work is over you can reward yourself with some egg nog around the tree and show off your efforts to your family and friends.
First, you will need a crowbar and some muscles to pull apart the pallets to get the slats free. Use a hammer to bang the nails out of the ends of the slats. Next use the template to measure and cut (using a skill saw) the slats into the required lengths. Once they are sized, drill holes into the centre of each slat so they fit over/around the dowling; we used a 1.5″ drill bit but change according to your dowling size. Sand the inner edges of the drill holes if you are having trouble fitting them over the dowling. Once this has been done, it’s a good idea to stack the slats in groups so you can plan out the colour sequence if you are using a variety of colours
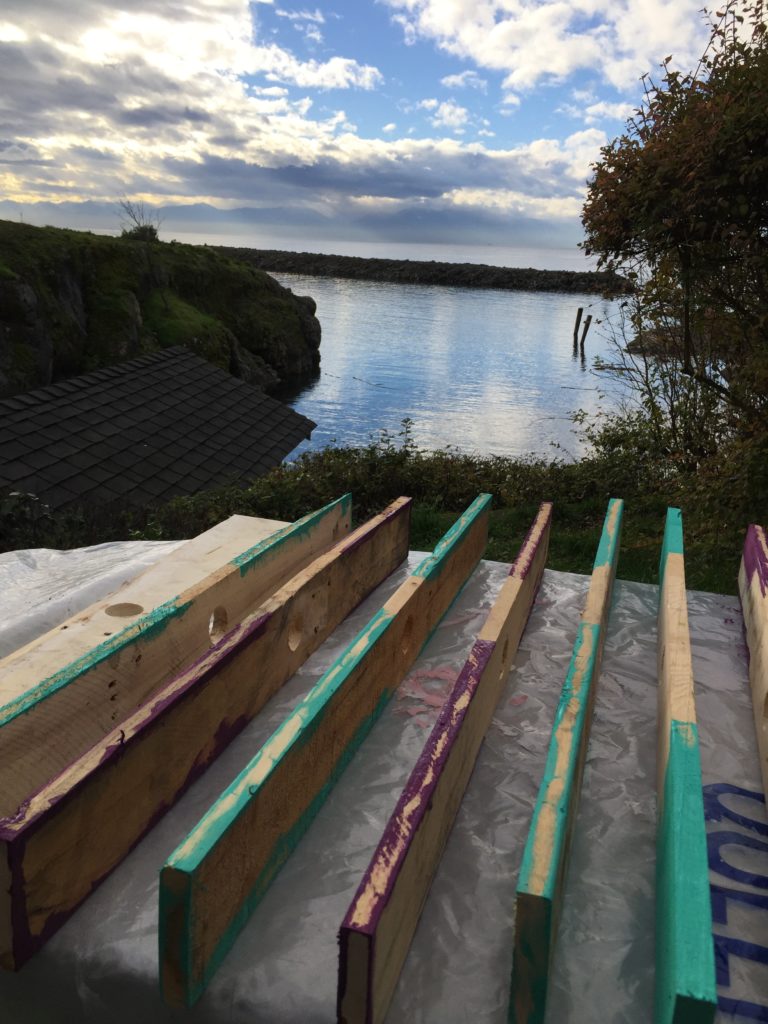
Step four – Paint, underestimate the amount you need, take a trip to the store
We took a clean paintbrush to the slats to remove any excess dust and then quickly painted the edges of each slat with the acrylic paint using purple and teal (see the picture below for guidance). Luckily, it was a beautiful day and we were able to paint outside and the sun helped dry the paint quickly. Next we applied the Country Chic paint in Simplicity (white) to cover the coloured paint and full surface of the slat – shout-out to Right Price Decor for giving us a discount when we need to stock up on Simplicity after running out! When the slats had dried fully, we sanded the edges to reveal the purple and teal paint beneath the Simplicity surface
Step five – Enlist a tree expert to find a stump for the tree stand
The perks of being a tree faller’s wife kicked in when Gina was able to source a tree stump that we could use for the base. Gina also got her husband to drill a hole in it so that the dowling would fit securely into the stump. If you have a tree stand already, you can skip this step or use your DIY skills to create your own!

Step six – Make some decorations
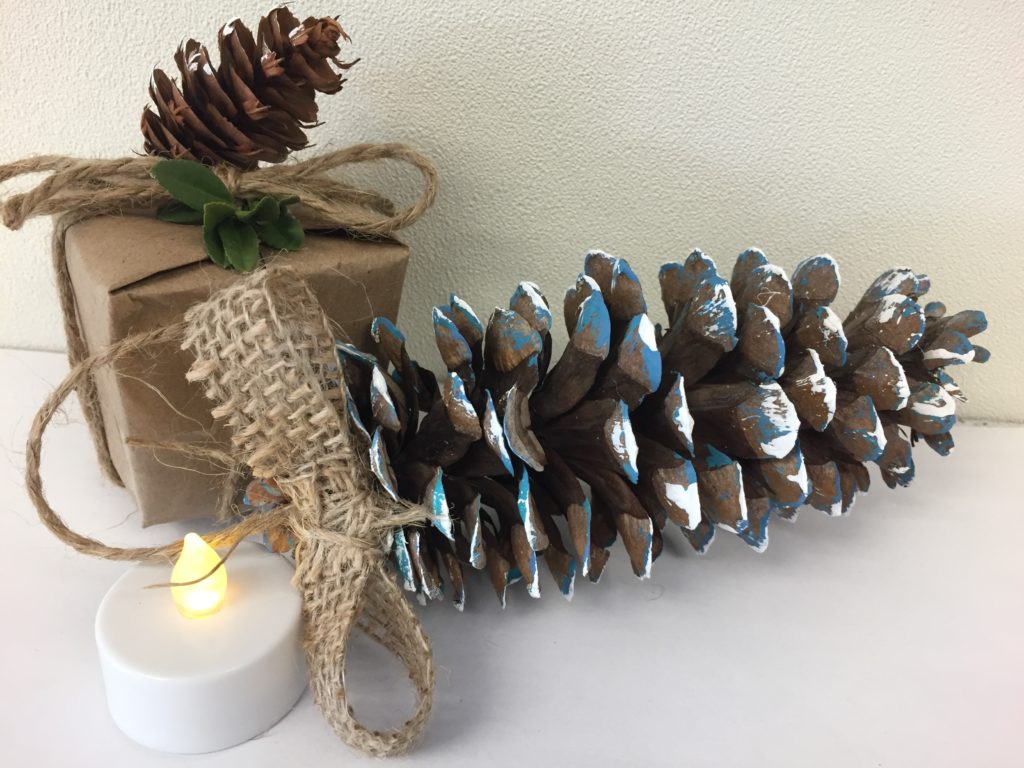
When it came to decorations we thought country chic would compliment our tree best. We wrapped boxes in kraft paper and twine and topped them with greens and spray painted pinecones. We drilled holes in mason jar lids to hang them with battery-powered tea-lights inside and we decorated pinecones with greens to add some colour and life to the tree. We also wanted purple, our corporate colour, to shine through so we wound a string of lights around the dowling and through the slats from the bottom up
Step seven – Donate to the BCCHF
If you like our tree, please consider donating to the BC Children’s Hospital by texting TREE001 to 456-78
Also, be sure to follow the Victoria Festival of Trees on Facebook and Twitter to see all of the trees and to visit The Bay Centre and The Empress, if you are in Victoria, to see the trees and pick your favourite for the People’s Choice Award
UsedHQ
Chatter from the UsedHQ. We're the number one Canadian online classifieds, passionate about keeping items out of landfills, preserving unique curiosities, crafting, upcycling, anything vintage and SAVING MONEY!
Jodie
THAT IS FRICKIN AWESOME!!!! ABSOLUTELY BEAUTIFUL – I LOVE IT!!!
UsedHQ
Thanks for the enthusiasm! We think it turned out pretty well 🙂