DIY projects for the non-doer
In two weeks, I’m going to be hanging out with the UsedVictoria crew at the Vancouver Island Mini Maker Faire, so I thought I’d get myself psyched up by attempting to tackle some do-it-yourself projects. Unfortunately, I don’t believe I possess single DIY bone in my body…if I do it’s maybe hiding in my small pinky toe! I’ve always been super jealous of those Martha Stewart types (you know who you are!) who can take some random or ugly item and turn it into something beautiful and contemporary.
For example, when Ashley of Creating Love & Joy looks at an old lamp like this from the 70s, she sees it’s potential. When I look at the lamp, I just see an ugly lamp from 1973 that no one should ever own…even in 1973!

Before: Seriously ugly lamp.

After: I never would have thought to do this.
I’m also jealous because by recycling old goods and making them new again, these talented DIYers save themselves a lot of money, something you all know is one of my favorite things to do.
My Mom has always had this ability (guess the DIY gene fairy missed me!) and through the years, she’s taught me a couple of DIY tricks that I actually believe I can accomplish (thank God for my pinky toe). This particular DIY project is my favorite. It can actually be done by ANYONE and always turns out looking great. That, and it won’t lighten your wallet. Promise!
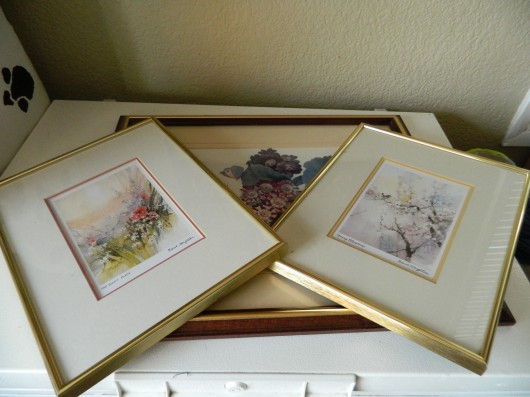
How many times have you walked into a thrift store or garage sale and seen dozens of ugly brass picture frames stacked on top of eachother for a couple bucks each? The frames are the right size and shape except for that ugly brass color. Well, turns out you can actually repaint the brass and totally reinvent the frames. My mom has been doing this for years and now that I’m older and have a home of my own, I decided I would also attempt this handy trick.

All you need is an old brass picture frame found anywhere (you can almost always find some on your local Used Site), a small paint brush like the ones your kids use to paint with and some acrylic paint (you can find small bottles of it in a variety of colors at the dollar store as well as the brushes). Then you simply take the glass out of your frame if it has some (I recommend giving it a good scrub with some vinegar,) place the frame on some newspaper and paint.
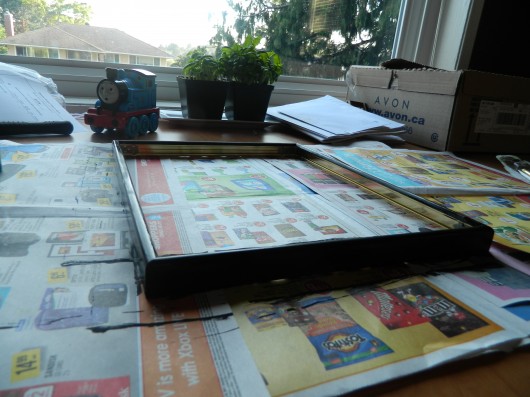
Within five minutes, you have a gorgeous new frame that looks brand new! Well, okay not actually five minutes. Turns out it does take quite a while to dry which is why I don’t have a picture of the finished product hung on a wall. You’ll probably have to apply a couple of coats on to really hide the brass. You can also do this to old wooden frames, but be aware that sometimes the paint can’t completely cover the frames if they’ve been stained (unless you sand and/or prime them, and that’s more work!) In this case, it’s probably best to spray paint them instead.
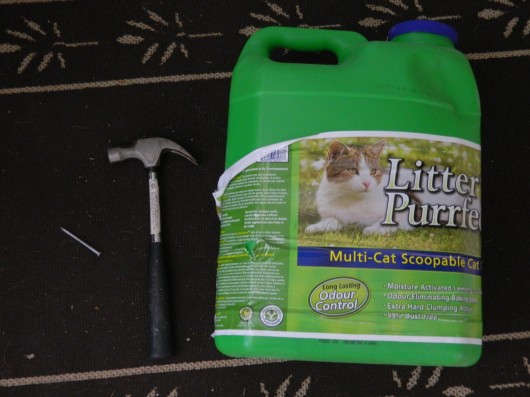
My husband actually came up with this next DIY idea which nearly caused me to pass out from shock! He’s not exactly the first person I think of when I think of DIYers… His solution is usually to buy something new or hire someone to fix it, a quality I actually do admire when something goes wrong with the house. I’m always thankful I didn’t marry a Tim “The Toolman” Taylor! I was telling him that I needed to go out and buy a watering can for my potted flowers on our back porch as it would be so much easier than having to drag the hose all the way across the lawn to water them every time. ( I know, how lazy am I??) He replied, “Why don’t you just use one of the kitty litter containers?” Huh? was my obvious reply. But after explaining his idea I realized that it was actually totally brilliant and so simple.
my original plan…
All you need is a large container with a handle like this kitty litter container or even something smaller like a milk container. Then you just take a large nail and hammer holes into the top of the lid… Okay actually scratch that. I tried this but either the plastic lid was too thick or I was too weak because after fifty wacks with a hammer I only managed to get one hole! So I changed my course of action and just used a small drill to drill the holes into the lid… Well, actually I had my hubbie do it for me as I have a fear of power tools… Don’t judge me, do you know how many people hurt themselves with power tools each year?
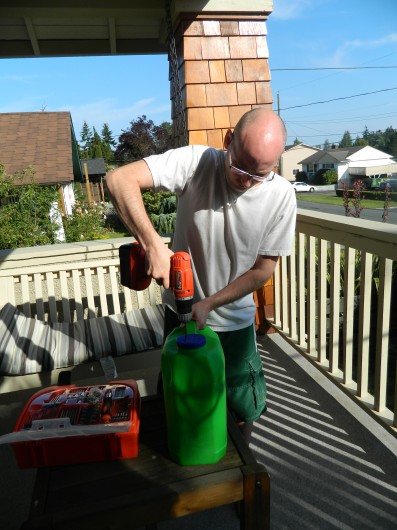
So after making this small adjustment to my plan…Voila! All done…I told you it was super easy. Fill with water and take it out to your plant to give them a shower with. A great way to recycle and reuse while saving money on buying a new watering can.

All this DIY stuff is getting me super pumped for the VI Mini MakersFaire and maybe I’ll feel like less of a fraud when I’m actually there! Lol. My next goal is to attempt to repaint a solid wooden oak table I bought on UsedVic and turn it into a contemporary kitchen table that will match my new leather chairs. So stay tuned to hear how that DIY project goes…I’m guessing it’s going to be a bit more complicated than the watering can! If you have any super easy DIY projects, I’d love to hear them…I’ve gotta keep that bone in my pinky toe alive before it disappears completely!
Carly Russell
Community Coordinator at UsedVictoria.com, blogger, social media junkie, proud mama, fabulously frugal, proud to be from our beautiful city!
Julie
Awesome! I really enjoy your blog!
Carly Russell-Huntley
Thanks so much Julie. I really appreciate it!