DIY oak kitchen table makeover that’s so easy even I can do it!
So last week I told about how I started exercising my DIY muscle and/or bone and tried a couple of super easy DIY projects that were basically fail proof. My picture frames turned out wonderfully and my watering can works great.
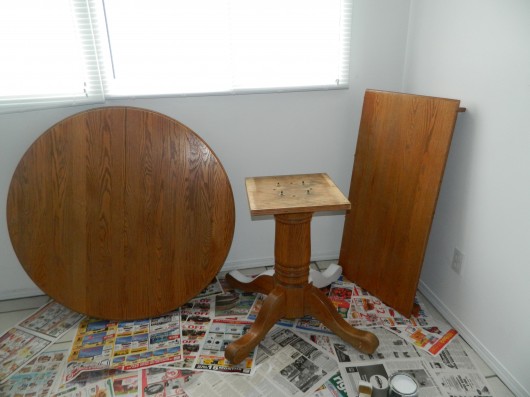
Since I was feeling rather good about myself and my DIY capabilities, I decided I would tackle a project that has been sitting in my basement for the last few months, haunting me. I bought a really nice solid oak kitchen table from UsedVic and I planned to repaint it to match these brand new leather dining chairs I bought (couldn’t find any used but got these on super sale, of course). I wouldn’t normally even think about taking on such a tricky DIY furniture challenge but I just can’t stand the look of that flimsy, non-wood material that affordable dining sets are made out of these days. They’re so light my five year old nephew Noah could probably hoist one over his head….he’s pretty strong anyways. “They just don’t make’em like they used to” said someone once ….no idea who, sorry!

Cost only $75 on UsedVic! Awesome deal!
I brought the table home and called up my mom who told me I would have to resand the entire table before painting. This sounded difficult, tedious and just plain scary. I pictured myself sanding the table so far down that it would crack and then I would crack and cry for ruining it. Not fun at all!
Luckily no tears were shed thanks to fellow UsedEverywhere blogger Andrea Tomkins! She recently wrote a blog post about a woman who refinished these beautiful antique doors and turned them into headboards. And instead of having to strip and sand the doors of their ugly paint job, she simply painted them with an all in one acrylic primer. I’d never heard of such a product before but turns out you can buy it anywhere now. Don’t you just love evolving technology??
I headed out to Home Depot and bought some CIL Smart Any Where Primer which will bond to any surface. There were a couple of other brands as well that I think would also work. Then I simply painted the kitchen table with the primer and let it dry.
The guys at HD told me that I only needed to cover it once and it didn’t matter if it wasn’t solidly painted…it just needs to be on there for the next paint to adhere to.
I also purchased some semi-gloss paint to match the leather chairs I purchased…you should either get semi-gloss or satin finish paint if you are redoing something that will see a lot of traffic like a kitchen table or coffee table.
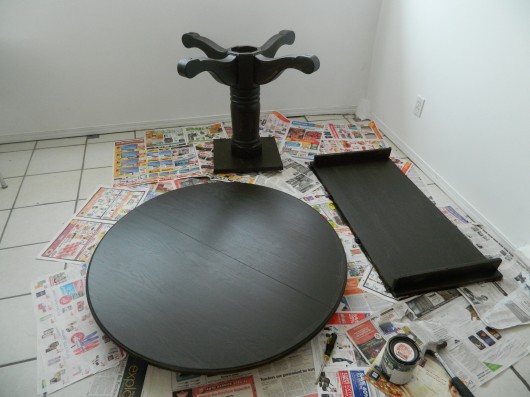
Then I simply painted over the primer and voila!
…a beautiful modern looking kitchen table brought to life again from 1982! It really can’t get any easier than this.
Well, actually it wasn’t totally voila (you may have noticed this is one of the only french words I know as I tend to use it a lot) as I had to go back to HD once to have them retint the paint as it was a bit too light to match the chair. But look at this!! It matches the chairs perfectly. Woot! Woot! So excited!
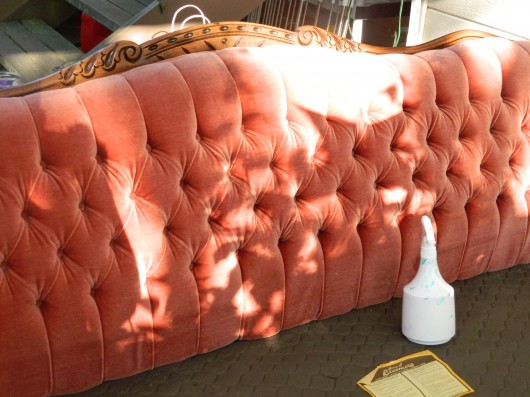
Now I can confidently walk into the Vancouver Island Mini Maker Faire this weekend with my head held high, knowing that I do have a little DIY in me after all. In fact, to prove it I joined up with a couple of the UsedVictoria gals and we spent the last week repainting an antique French provincial couch and chair for the event. That’s right…painted it! And it looks absolutely amazing! (Here’s a teaser before pic of the couch)
But don’t take my word for it! If you’re anywhere near Victoria, BC this weekend, come say hello to us and see for yourself. Otherwise, you’ll have to wait until next week for the big reveal. Happy DIYing everyone!


Judy
Nice job on that table, Carly. It looks great (I am now talking to Dad to see if we can redo my table).
xxx
Melanie
Awesome! I have the exact table I wanted to paint but was procrastinating because I didn’t want to sand. Thanks!!
Jen
This is awesome. I have a 14 year old oak table that is totally solid, great condition but I’m tired of the light colour. Did you paint it black or a really dark brown? SO tempted to do this with a few things we own! WOW.
andrea
Great job Carly! I’m so glad the primer tip worked for you!
Carly Russell-Huntley
So glad this has helped everyone. I painted it “espresso” but had to add more black to the paint to make it darker. I’ve been scouring UsedVic ever since looking for my next project. 🙂
Jenn
What is the name of the color you got for the top coat (brown) of the table? I have a very similar oval shaped oak table that i could love to do this to, and the chairs as well!
carly russell
Hi Jenn,
The name of the color was espresso which was the darkest brown I could find at home depot. But it still ended up too light so I had one of the paint technicians fiddle with the color till it was dark enough. Make sure to get someone with lots of experience so they don’t turn it black. Good luck with your table makeover.