A bright, bold and deliciously DIY nursery
But first…a shot of my girls.

There. That’s out of the way. Alex is on the right and Hailey is on the left.
Now for what you came for
Here are a couple of before shots.
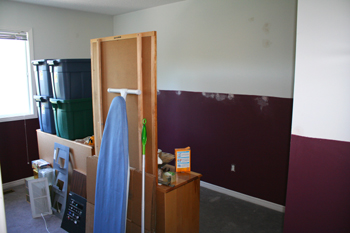
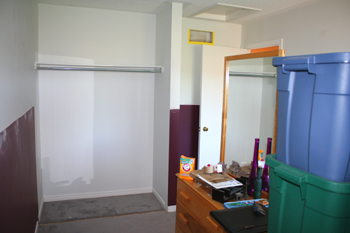
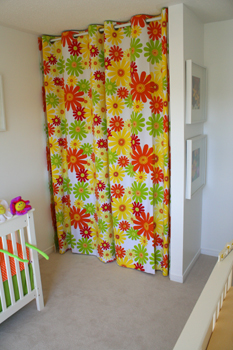
Here are a couple of after shots because life is short and so why wait for dessert?

The details
First, let me state that I SHOULD have photographed the room on a day when the sun wasn’t streaming in so blindingly that it affected the interior shots. My bad. The room was, to the naked eye, sparklingly crisp and white as white could be – I shopped around for the purest white paint I could find. Other caveats: I was still waiting for my shutters to arrive and be installed – long stressy story – and I also didn’t have the leather glider (our indulgence) in the corner at the time of taking the photos. The glider, really, isn’t the ‘deal’ I believe you came here to find, but it was pretty swank in all its white leather glory!
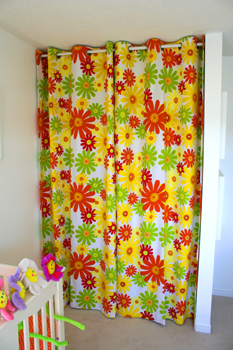
The IKEA hack (a.k.a the closet)
The old closet was that standard one bar jobbie with the floor to ceiling cheap sliding door – standard issue stuff. We removed the doors, removed the bar, and then had some fun with fabric and these standard-issue IKEA Expedit shelves. We then purchased inexpensive expandable curtain rods from Home Depot (at about $6 each) and some inserts for the Expedit shelves, attached the units to the wall, and the curtain rods to the wall and the shelves. We even spaced the rods so that you could simply eliminate the middle one as the girls grew and needed more space for their clothes.
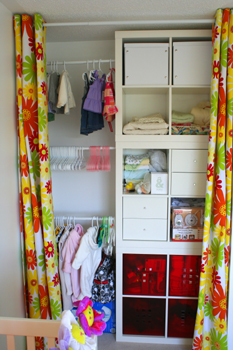
I shopped everywhere for fabric (*any other Mom out there remember having all the time in the world to go from store to store, and even other cities looking for things like fabric? Yah…I miss it too.), finding it finally at Ottawa’s Rockland Textiles, and had a friend sew them, adding the grommets as well (she also sewed the custom lime green crib skirts, which looked amazing).
The hand-me-down dresser
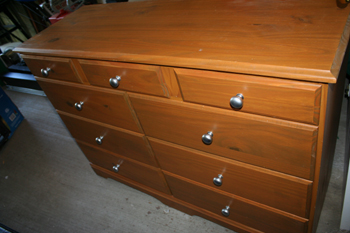
I think my favourite DIY project ever has to be this dresser. I turned it from this:
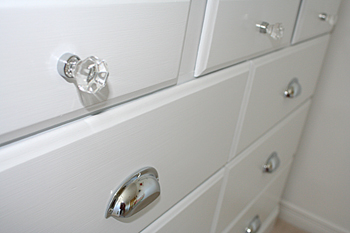
To this:

The dresser, a free gift, was old and ugly; however it was solid wood, so we knew we could do something cool with it. I wanted originally to have it done professionally in a laquered white, but then discovered that it would be very likely in our climate to split and have ‘veins’ in it. So not worth the money. And regardless of the outcome, it STILL wouldn’t have been worth the money. It looked amazing when I was done and all it cost was sandpaper, time and effort and a bit ‘o paint (we used a high gloss to give it a nice shine). BTW the knobs and pulls were purchased from Lee Valley Tools.
DIY artwork
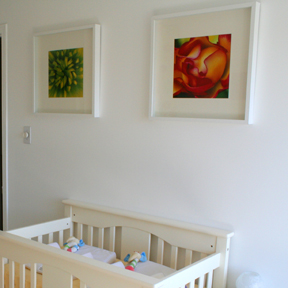
I have ALWAYS hated pastels (pink in particular) and LOVED bright, bold colours. To infuse the room with natural, saturated colour, I decided to develop macro photos of various flowers and put them in these great, inexpensive frames from IKEA, hung gallery-style around the room*. A few were my own from my garden and the rest were downloaded from Flickr from generous amateur photographers around the world. FYI, Costco only charges $1.99 per 12×12 reproduction.
Mini cribs
We love our cribs. I searched far and wide for these cribs. These cribs rock. They are mini-cribs. They are slightly smaller than a traditional crib, perfect for a small space, and the best part? They are convertible to TWIN beds. Not double beds, like other convertibles. (That always seemed weird to me. A toddler doesn’t need a double bed. That’s just crazy. He/she needs space to play and run around.) And with twins, I wanted them to sleep in the same room, even when they graduated. These fit. Two double beds? Not so much.
So yes. The cribs were bought from Lasso Baby in Vancouver and shipped here (looks like they don’t have my model anymore. Boo.). I bought the twin bed kits to go with them (these cribs are hard to find in Canada) and then had to buy the custom crib sheets from a US source and have them shipped to a US address. See note above about time to shop.
All worth it, of course.
The rest
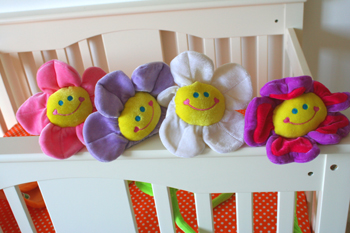
The rest is all the little stuff. I had a lot of fun. So quickly:
The hanging shelves were from Home Depot for under $20 each. The little mirror from Bouclair Home – love their accents and price points.
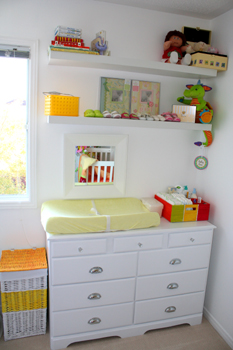
The change area was even more fun. Free change pad hand-me-down from another Mommy (never underestimate the value of befriending and helping out new moms leading up to starting your own family. I didn’t do this strategically, per se, but one COULD DO THAT and benefit greatly. Just sayin’.)
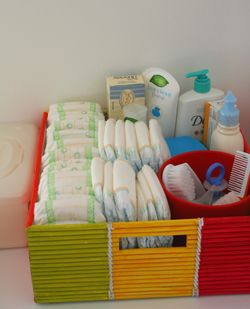
The colourful basket to hold all the diaper supplies turned out great. I shopped for what seemed like forever (sensing a theme yet?) and finally found a white square basket of the right height and then painted it myself to have it tie in with the colour scheme. About $14 from HomeSense if I recall…
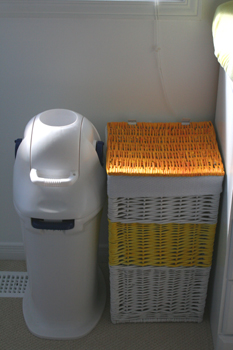
And finally, the laundry hamper I picked up at Home Outfitters – it was white as well, and then I painted the lid and the middle section.
When you crunch it all together, there were a lot of hand-me-downs, a number of fun little cost-savings projects, a lot of DIY and a few splurges to make it special. Call it hybrid design? What do you think?
*Note that the frames are NOW hung very securely with strong wire and hook fasteners, but we originally tried to use the 3M Command picture hanging strips. We put MORE than the recommended amount on the frames, followed the instructions carefully, and in the middle of the night, on two separate occasions, the frames FELL OFF THE WALL, smashing the glass in them and denting the cribs in the fall. If I had had my newborns in there…well, I really don’t want to think about it. Needless to say, I don’t recommend this product.
Pam @writewrds
Love it. Looks fabulous! You did a great job!
erin
Wow!! Very inspiring!! I’m excited to get my baby room underway. We move in 20 days….
Michal Ann Cochran
wonderful! so bright and cheerful. Thanks for sharing the details on the closet – good ideas.
Rachel - Command(TM) Brand
Hi, I am Rachel with Command(TM) Brand Adhesive. While we do put a warning on each package to not hang items over the bed we would not expect them to fall if the paint was over 7 days cured, the proper number of strips were used for the weight, and the other instructions were followed. We would be more than happy to discuss this further with you if you are interested. We are available at 800-537-9514 with reference #4864664. If you feel the product failed and all instructions were followed we do want to assist as we expect our product to meet the high quality standards our customers are expecting from us. Thanks, Rachel
Pam Stewart
Thanks everyone – There was a lot of stress around the birth of my girls, so I put a LOT of positive energy into the room, and was very pleased with the end result. Of course, within a few months of living in that little townhouse with twin bouncy chairs, twin exersaucers and twin everything lying around, we bought a bigger home and moved out and into a room ready to do with pink and lime green. But that was just it. You didn’t need to do anything to it to ‘de-babyfy’ it, which I’m sure was nice to the buyers…!
Rachel, thank you for the follow up. I simply can’t recall now if the label back then had that caution on it (I don’t think it did – I would have recalled, I think) but this happened in October 2010, so it’s been a while. I really do feel like we followed all the instructions to a tee. That said, I appreciate that you have reached out and will follow up with you personally. Thank you.